Simplify the creation of CLI tools, MCP servers, and web applications.
A framework, runtime, and ecosystem. Batteries included.


Quick Start · Why Photon · Beam UI · How It Works · Docs
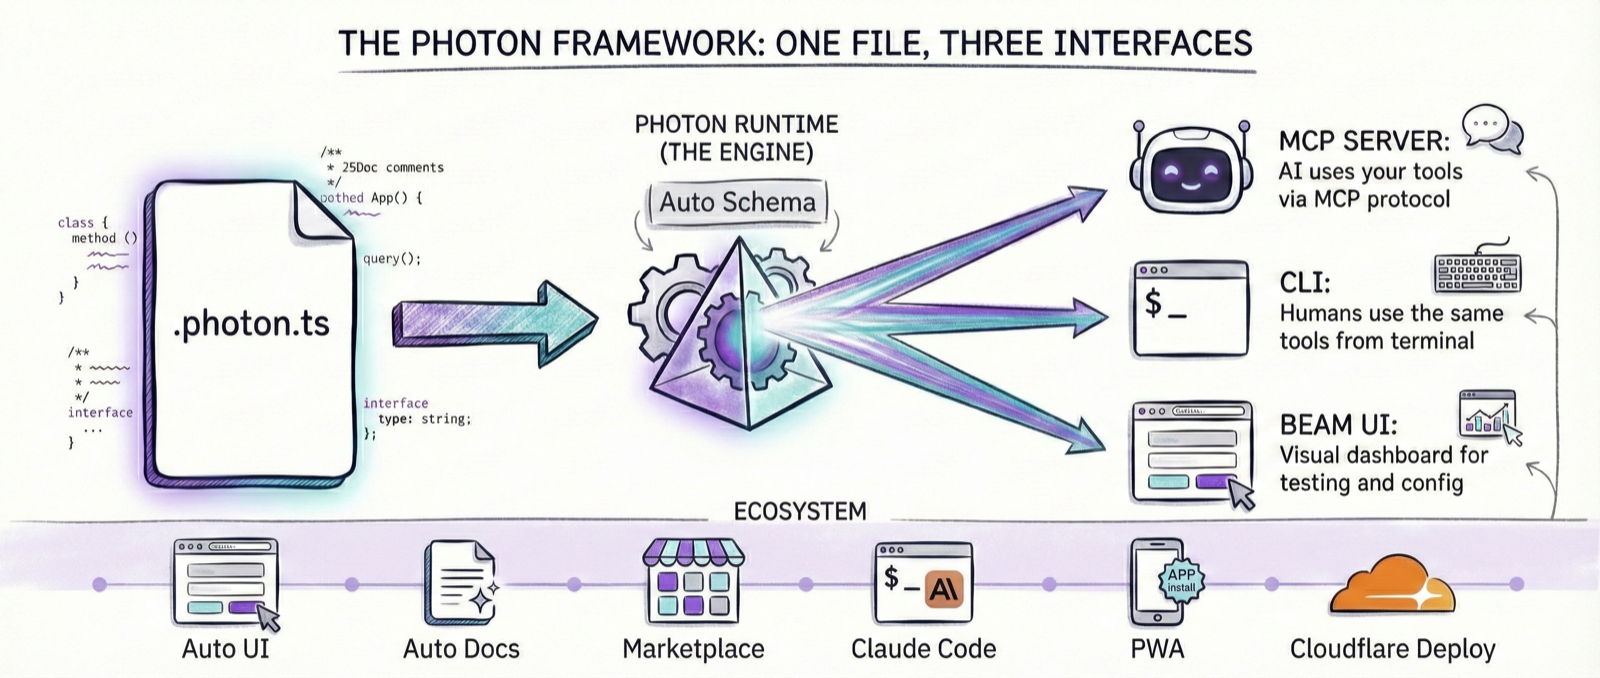
So, here is the situation. You write a single TypeScript file. Just one. And somehow, through some dark magic I don't fully understand either, you get three things at once:
- An MCP server (so Claude or Cursor can use your tools).
- A CLI tool (so you can run it from the terminal like a normal human).
- A web application (a visual dashboard called "Beam" that makes forms for you).
It looks like this:
analytics.photon.ts → MCP Server | CLI Tool | Web UI
You just write the logic. Photon deals with the protocols, schemas, and the boring stuff that usually makes you question your life choices.
- Developers who want to give AI access to their database but are too lazy to write a full server.
- Teams who want to share tools without emailing zip files.
- Anyone who wants a CLI and a web UI without writing the boilerplate.
You don't need to know what "MCP" actually stands for. If you can write a TypeScript class, you are qualified.
Three reasons, if you want the short version. (Read the longer version)
MCP is personal. The best MCP is the one built for exactly one use case. Yours. Your team's. Your company's. When you stop building for everyone, the code gets absurdly simple. One file. Twelve lines. Not twelve hundred.
Solve once, run forever. If an LLM figured out your workflow the first time, why ask it to re-derive the same answer from scratch every time? Photon lets you keep the answer. No middleman, no tokens, no latency.
Same door, every key. AI calls it through MCP. You call it through CLI. You open it in Beam. Same methods, same data, same result. And half the time, you don't need AI at all. You just need the data.
If you are the type who likes to just run commands and see what happens:
npm install -g @portel/photon
photon maker new my-tool       # Makes a new photon
photon                         # Opens the Beam UI
Or if you don't want to install anything (I get it):
npx @portel/photon maker new my-tool
npx @portel/photon
Note: You need Node.js 18+. Also, TypeScript helps, but Photon handles the compiling, so you don't have to fight with
tsconfig.json.
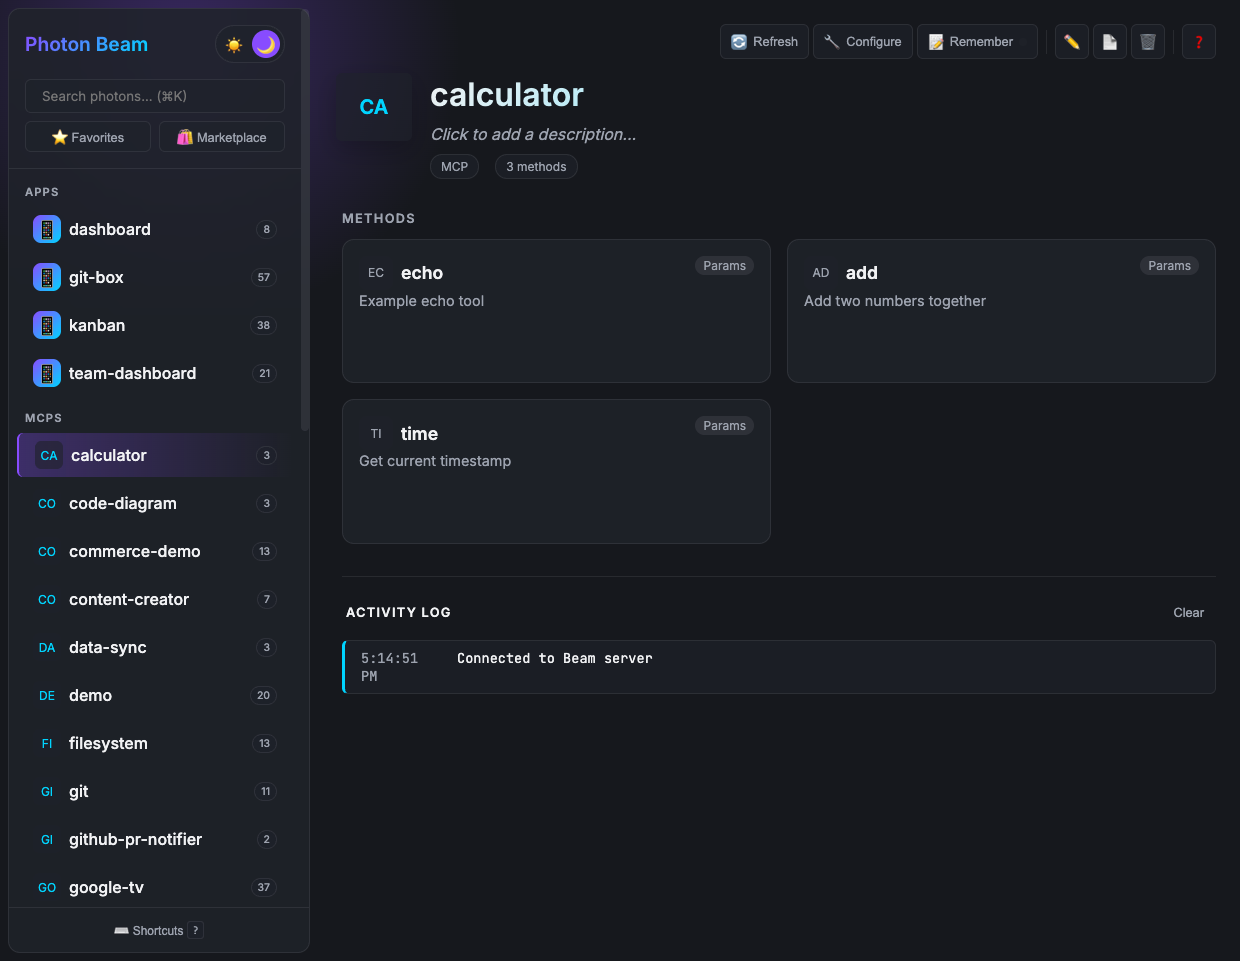
Beam is the dashboard. It's where you go to poke your tools and see if they work before you let an AI loose on them.
Run photon. That's it.
If you want to use this with Claude or Cursor, you need the config.
photon info weather --mcpIt spits out some JSON:
{
  "mcpServers": {
    "weather": {
      "command": "photon",
      "args": ["mcp", "weather"]
    }
  }
}
Copy that. Paste it into your AI client's config file. Done.
Works with Claude Desktop, Claude Code, Cursor, and any MCP-compatible client.
We also have a marketplace. 35 photons and counting.
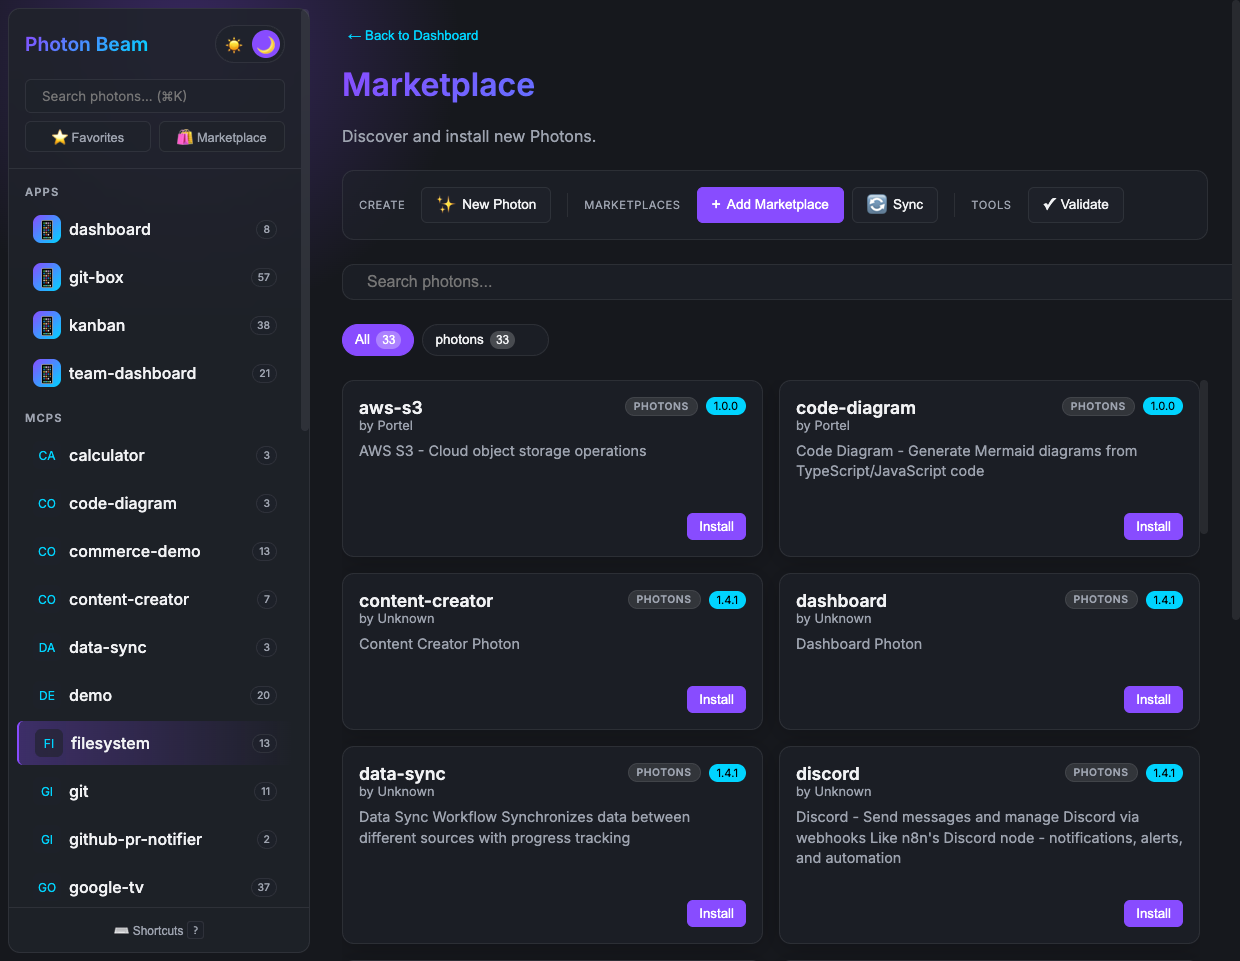
photon search postgres
photon add postgres
Browse the full catalog and documentation in the official photons repository.
You can also make a private marketplace for your team, so internal tools stay off the public internet.
A photon is just a TypeScript class. The public methods become tools. Photon reads your code, looks at the types, reads your comments, and then generates everything else.
I'll show you.
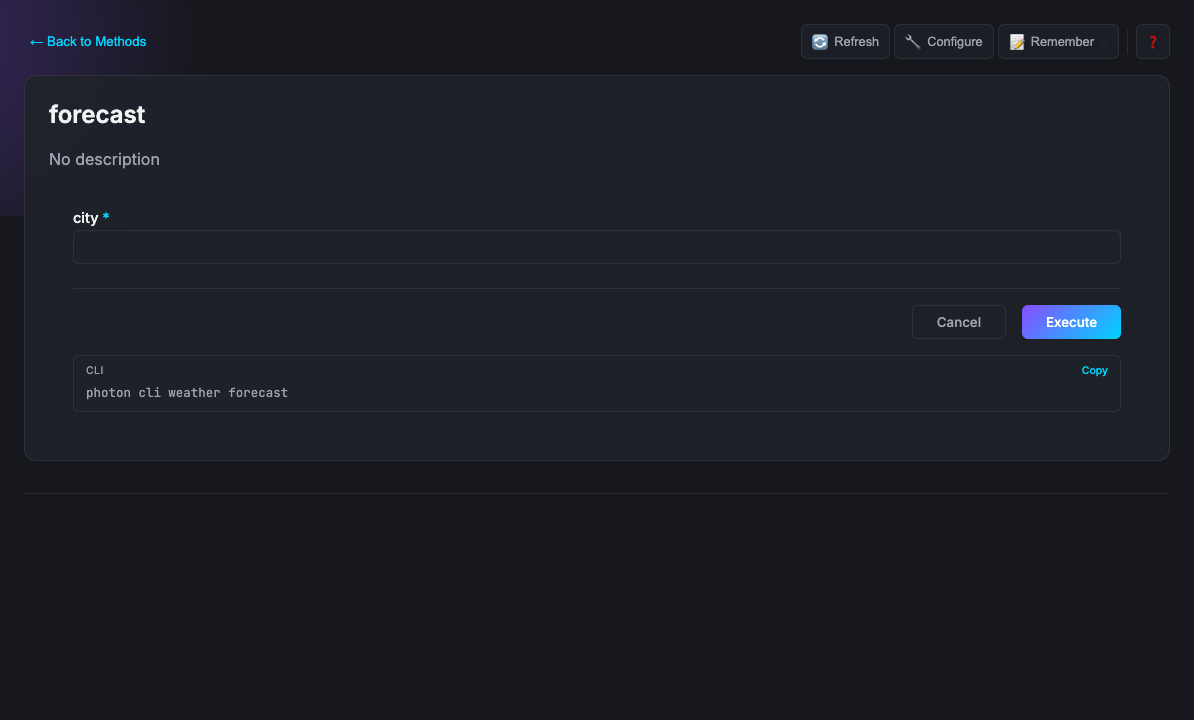
Here is a class with one method. This is a valid photon.
export default class Weather {
async forecast(params: { city: string }) {
return `Weather for ${params.city}: Sunny, 72°F`;
}
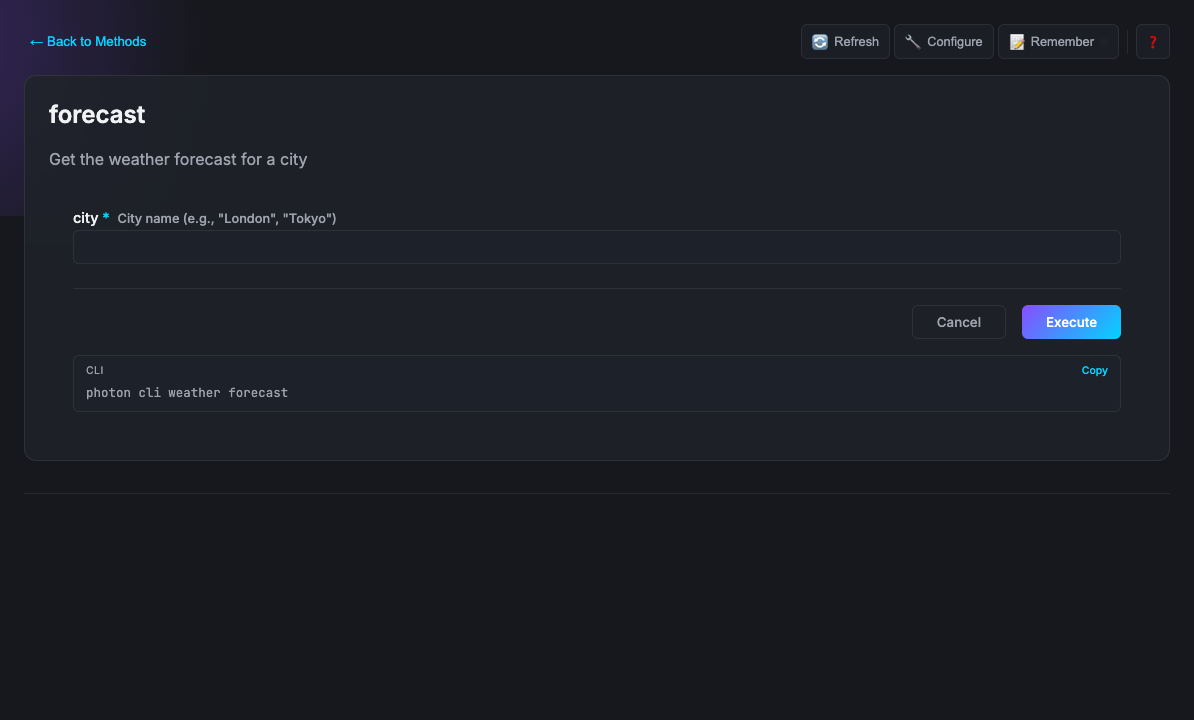
}What happens: Beam sees this and makes a form with a text box labeled "city". You click a button, and it runs.
What you get:
photon mcp weather(The server for Claude)photon cli weather forecast --city Paris(The command line tool)photon(The web UI)
If you add JSDoc comments, they show up as descriptions.
/**
 * Weather - Check weather forecasts worldwide
 *
 * Provides current conditions.
 */
export default class Weather {
  /**
   * Get the weather forecast
   * @param city City name (e.g., "London")
   */
  async forecast(params: { city: string }) {
    return `Weather for ${params.city}: Sunny, 72°F`;
  }
}
What happens: Now the UI has helpful text. Also, the AI client reads this to understand what the tool does.
If you need an API key, put it in the constructor.
export default class Weather {
constructor(
private apiKey: string,
private units: string = 'metric'
) {}
async forecast(params: { city: string }) {
const res = await fetch(
`https://api.openweathermap.org/data/2.5/weather?q=${params.city}&appid=${this.apiKey}&units=${this.units}`
);
return await res.json();
}
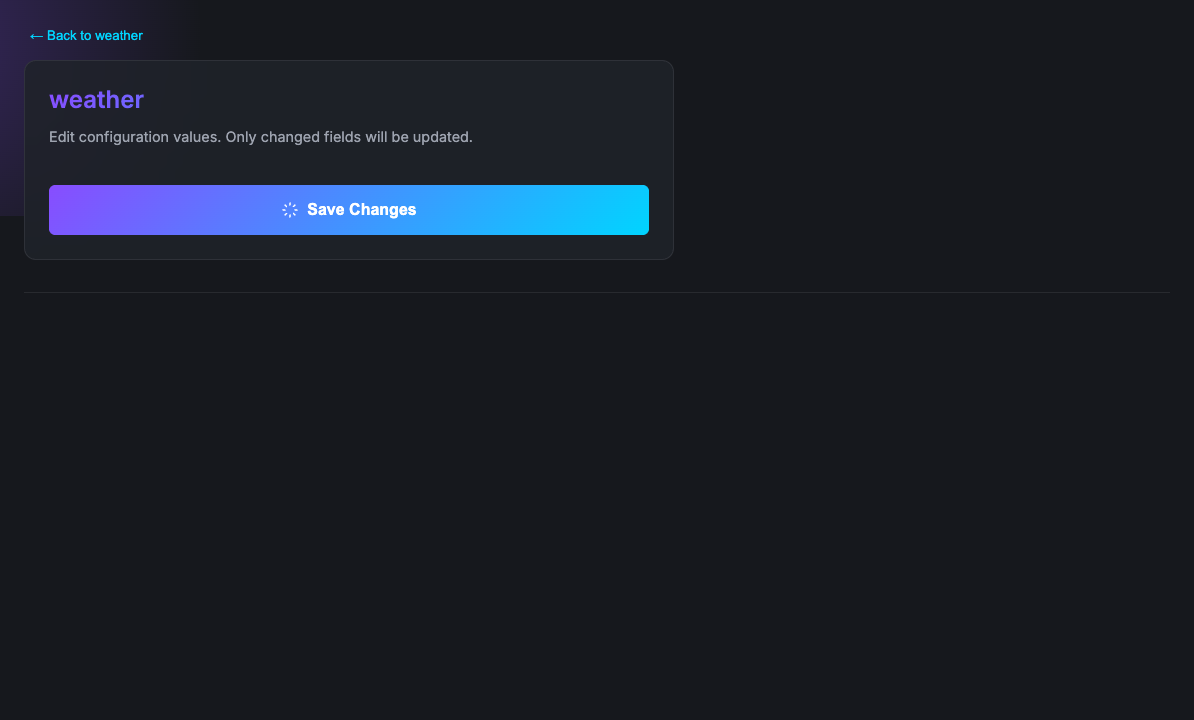
}What happens: Beam creates a settings panel. apiKey becomes a password field. It also maps to environment variables like WEATHER_API_KEY. It just works.
You can add tags to valid inputs.
/**
* Weather - Check weather forecasts worldwide
* @dependencies node-fetch@^3.0.0
*/
export default class Weather {
constructor(
private apiKey: string,
private units: string = 'metric'
) {}
/**
* Get the weather forecast for a city
* @param city City name {@example London} {@pattern ^[a-zA-Z\s]+$}
* @param days Number of days {@min 1} {@max 7}
* @format table
*/
async forecast(params: { city: string; days?: number }) {
// fetch and return forecast data...
}
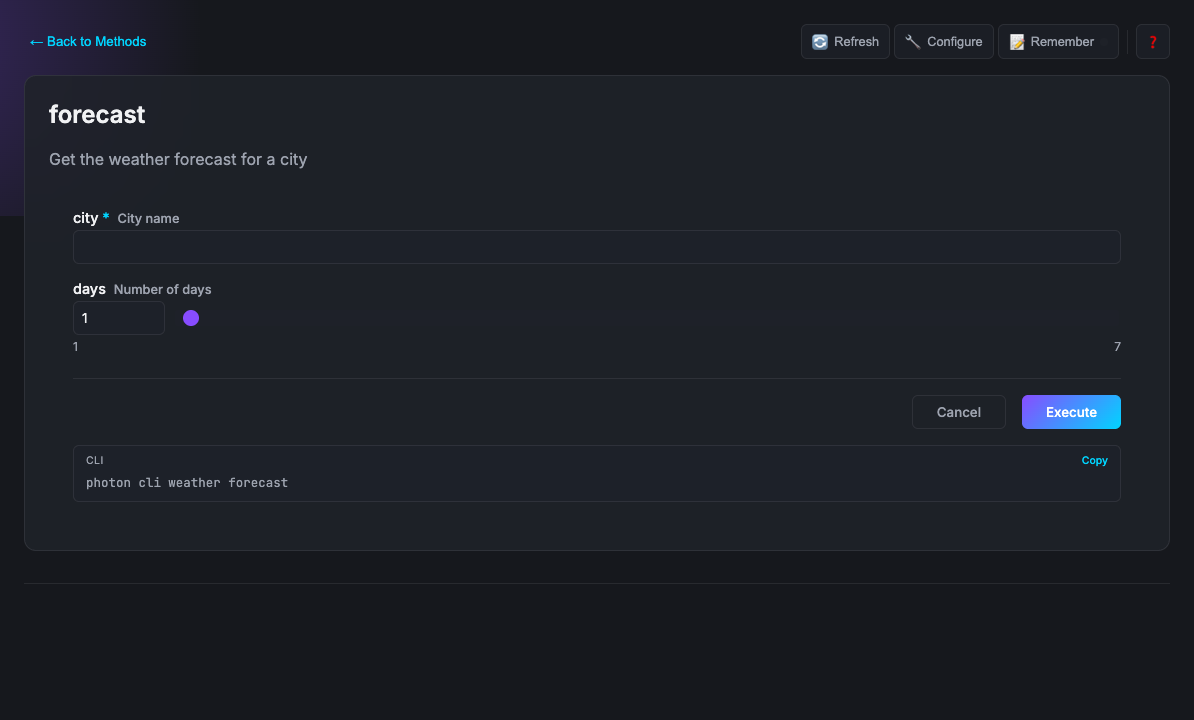
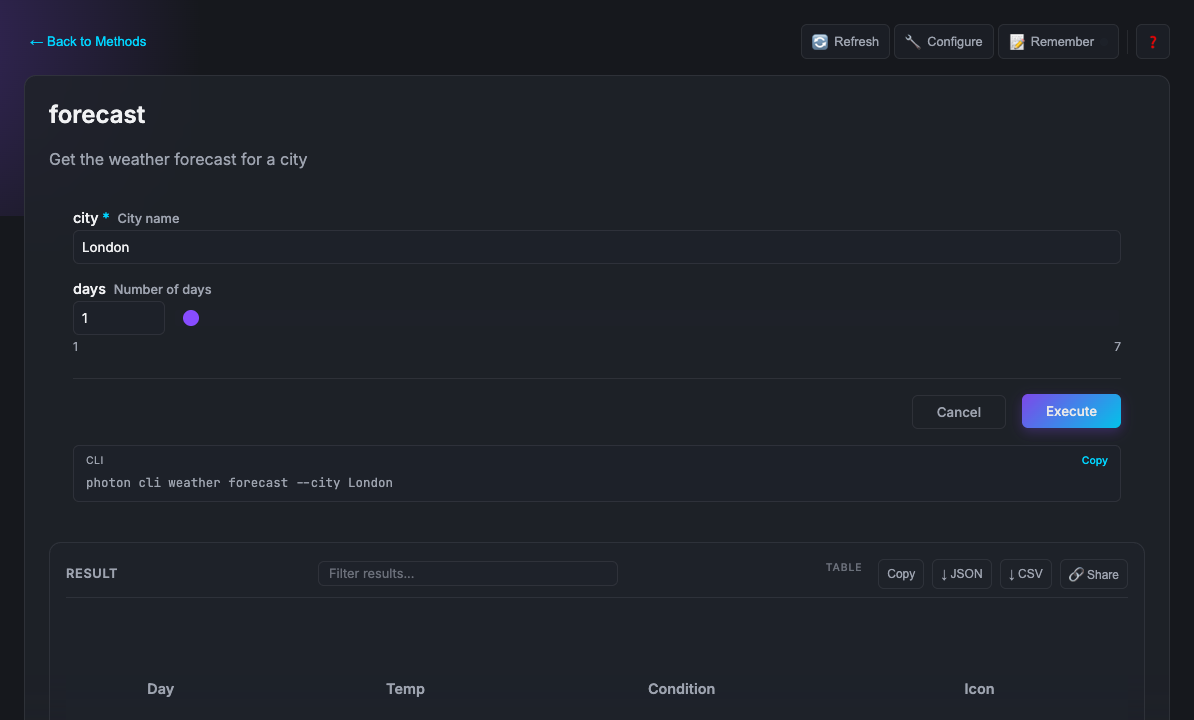
}What happens:
- The
cityinput validates the regex. - The
daysinput becomes a number spinner (1-7). - The result is formatted as a table.
@dependenciesmakes Photon installnode-fetchautomatically. You don't even runnpm install.
If your photon wraps a command-line tool (e.g. ffmpeg, git, docker), declare it with @cli. Photon checks for the tool at load time and refuses to load if it's missing.
/**
 * Video processor
 * @cli ffmpeg - https://ffmpeg.org/download.html
 * @cli imagemagick - https://imagemagick.org/script/download.php
 */
export default class VideoProcessor {
  async convert({ input, format }: { input: string; format: string }) {
    // ffmpeg is guaranteed to exist if this method runs
  }
}
If ffmpeg is not installed, the photon won't load and the user sees:
VideoProcessor requires the following CLI tools to be installed:
  - ffmpeg: Install from https://ffmpeg.org/download.html
See the full Tag Reference for all available tags. There are 30+ covering validation, UI hints, scheduling, webhooks, and more.
If the auto-generated form is too boring, you can write your own HTML.
/**
 * Weather - Check weather forecasts worldwide
 * @dependencies node-fetch@^3.0.0
 * @ui dashboard ./ui/weather.html
 */
export default class Weather {
  constructor(private apiKey: string, private units: string = 'metric') {}

  /**
   * Get the weather forecast for a city
   * @ui dashboard
   * @format table
   */
  async forecast(params: { city: string; days?: number }) {
    // returns structured weather data
  }
}
<!-- ui/weather.html -->
<div id="weather-app">
<div id="forecast"></div>
</div>
<script>
window.photon.onResult(data => {
document.getElementById('forecast').innerHTML = renderWeather(data);
});
</script>What changes in Beam: Instead of the auto-generated table, results render inside your custom HTML (a weather dashboard with icons, charts, or any visualization you build). The window.photon API bridges your UI to the tool system.
Custom UIs follow the MCP Apps Extension (SEP-1865) standard and work across compatible hosts. See the Custom UI Guide.
| Step | You write | Photon generates |
|---|---|---|
| 1. Methods | A function | Tools, CLI commands, Forms |
| 2. JSDoc | Comments | Descriptions for AI and Humans |
| 3. Constructor | Arguments | Config UI, Env vars |
| 4. Tags | @tags |
Validation, Installers, Formatting |
| 5. Custom UI | HTML | A custom app |
If you are just skimming, here is what you need to know:
| Concept | What it is | Learn more |
|---|---|---|
| MCP | A way for AI to use your tools. It's a standard. | modelcontextprotocol.io |
| Photon file | A .photon.ts file. You define tools as methods in a class. |
Guide |
| Beam | A web dashboard. It shows your tools as forms. | Beam UI |
| Marketplace | A way to get other people's photons. | Marketplace |
| Daemon | A background thing that handles messages and jobs. | Daemon Pub/Sub |
| Tags | JSDoc comments that tell Photon what to do. | Tag Reference |
| Custom UI | When the auto-generated forms aren't enough. | Custom UI Guide |
A few commands you might use:
# Run
photon                            # Open Beam UI
photon mcp <name>                 # Run as MCP server
photon mcp <name> --dev           # MCP server with hot reload
photon cli <name> [method]        # Run as CLI tool

# Create
photon maker new <name>           # Scaffold a new photon

# Manage
photon info                       # List all photons
photon info <name> --mcp          # Get MCP client config (paste into Claude/Cursor)
photon validate <name>            # Check for errors

# Marketplace
photon add <name>                 # Install photon
photon search <query>             # Search marketplace
photon upgrade                    # Upgrade all

# Ops
photon doctor                     # Diagnose environment
photon audit                      # Security audit
photon test # Run testsTags are JSDoc annotations that control how Photon processes your code. Here are the most commonly used ones:
| Tag | Where | What it does |
|---|---|---|
@dependencies |
Class | Auto-install npm packages on first run |
@cli |
Class | Declare system CLI tool dependencies, checked at load time |
@format |
Method | Control result rendering (table, list, markdown, code, etc.) |
@param ... {@choice a,b,c} |
Param | Dropdown selection in Beam |
@param ... {@format email} |
Param | Input validation and field type |
@param ... {@min N} {@max N} |
Param | Numeric range constraints |
@ui |
Class/Method | Link a custom HTML template |
@webhook |
Method | Expose as HTTP endpoint |
@scheduled |
Method | Run on a cron schedule |
@locked |
Method | Distributed lock across processes |
@autorun |
Method | Auto-execute when selected in Beam |
@mcp |
Class | Inject another MCP server as a dependency |
@icon |
Class/Method | Set emoji icon |
This is a subset. See the full Tag Reference for all 30+ tags with examples.
Start here:
| Guide | |
|---|---|
| Getting Started | Create your first photon, step by step |
| Tag Reference | Complete JSDoc tag reference with examples |
| Naming Conventions | How to name methods so they read naturally as CLI commands |
| Troubleshooting | Common issues and solutions |
Build more:
| Topic | |
|---|---|
| Custom UI | Build rich interactive interfaces with window.photon |
| OAuth | Built-in OAuth 2.1 with Google, GitHub, Microsoft |
| Daemon Pub/Sub | Real-time cross-process messaging |
| Webhooks | HTTP endpoints for external services |
| Locks | Distributed locks for exclusive access |
| Advanced Patterns | Lifecycle hooks, dependency injection, interactive workflows |
| Deployment | Docker, Cloudflare Workers, AWS Lambda, Systemd |
Operate:
| Topic | |
|---|---|
| Security | Best practices and audit checklist |
| Marketplace Publishing | Create and share team marketplaces |
| Best Practices | Patterns for production photons |
| Comparison | Benchmarks vs official MCP implementations |
Reference: Architecture · Changelog · Contributing
If you find a bug, or if my code offends you, feel free to open an issue or a PR. See CONTRIBUTING.md.
MIT. Do what you want with it.
Singular focus. Precise target.
Made by Portel