The WEXO project is an automatic light control system that uses Wi-Fi network to detect presence. When no approved devices are connected to the network, the lights automatically turn off. The program runs as a console application.
The system offers a user-friendly interface for settings and maintance - with features such as:
- Setting active time periods
- Device blacklisting
- Manual system activation/deactivation
- Login system for access control
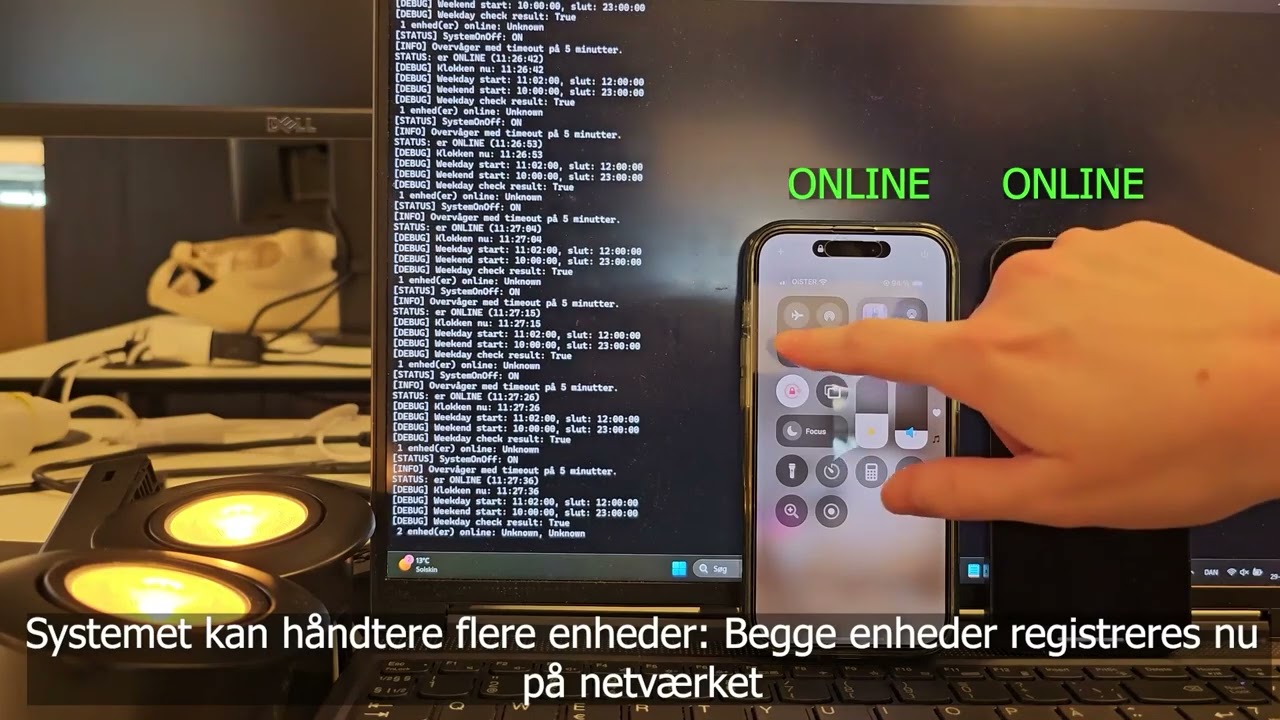
An animation that shows how the system works:

The user gets on WiFi and the light turns on. If the user turns off WiFi (or leave the workplace) the light turns off.
This project is a part of my education and was a group project in the spring of 2025.

The frontend allows you to maintain the system by adding blacklisted devices based on their MAC address, hostname, and description. You can also configure settings, such as enabling or disabling the program and setting the time intervals for it to run.
- Backend: C# (.NET)
- Frontend: Vue.js
- Database: Microsoft SQL Server (MSSQL)
- Languages: JavaScript, C#
- IDE: Visual Studio & Visual Studio Code
- Ensure the correct database is selected
- A folder under resources contains an SQL script that needs to be executed
This guide helps you set up the project locally. You’ll need:
- Visual Studio (for the backend)
- Node.js + npm (for the frontend)
- SQL Server (for the database)
- Start the Backend
- Open the backend project in Visual Studio
- Make sure the connection string to MSSQL is correctly configured in appsettings.json
- Also configure your WiFi API and Philips Hue Lights in appsettings.json
- Run the project
- Configure the Frontend baseURL
- Navigate to frontend/src/components/icons/baseURLconfig.js and set the correct backend URL.
- If the system is hosted, you can replace this with a domain
- Run the Frontend
-
Open a terminal (or command prompt) and navigate to the frontend folder:
cd [path-to-frontend] npm install npm run build This will generate a /dist folder. Deploy /dist to your server. -
This will generate a /dist folder. Deploy /dist to your server.
-
The frontend server typically starts at http://localhost:5173
- Log In and Configure the System
- Open the web interface in your browser
- Log in with a valid user (you can create one through the backend)
- Configure the system as needed:
- Set active time periods for light control
- Add devices to the blacklist
- Enable/disable the system
- For security reasons, CORS can be configured to only accept input from a specific URL (recommended)
📋 Requirements
- .NET SDK (for backend)
- Node.js and npm (for frontend)
- Microsoft SQL Server
- Access to Wi-Fi (or simulated network mode)
- Philips Hue Lights
🔐 Login
- The system uses a login to access the configuration page. We recommend clearing the login database before use to ensure only your own users exist.
Steps to create a login:
- In the HashingTest.cs program, insert your desired password inside ""
- Run the program; the hashed password will be printed in the terminal
- Insert the hashed password and your desired username using this query:
"INSERT INTO Users (username, password) VALUES ('YourName', 'HashedPassword')" - Run the query in your database — your login should now work